Shortly after killing the Warpriest (see part 1 of my walkthrough here), you will find yourself in a very dark zone called Golgoroth’s Cellar.
Golgoroth’s Cellar
This is another non-combat challenge like the jumping puzzles, but thankfully this one doesn’t feature bottomless pits quite as prominently. Golgoroth’s Cellar is a rather simple maze, but the darkness is somewhat disorienting and makes it more difficult. To get to the exit, take the first right, then go left, go left again, and then turn right. From there you can just go straight to get to the next boss. Just make sure you watch out for the bottomless pits that are positioned near almost every intersection. If you get lost, try watching this video of me running through the Cellar from start to finish:
However, you should know that there’s more to this maze than an entrance and an exit. There is also a Calcified Fragment (useful for obtaining Touch of Malice) as well as one of the several hidden chests in King’s Fall which contain Moldering Shards and other semi-exciting goodies. I might try to make a video guide for obtaining these treasures in the future, but for now I would recommend checking out this fantastic map of the place which was created by a Redditor named Taux.

Golgoroth’s Cellar Map (by Taux)
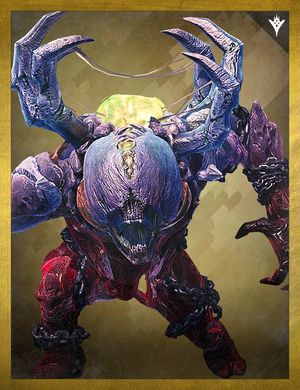
Golgoroth
Golgoroth is similar to Warpriest in that you can only do serious damage to him during a certain phase of the fight. Unlike Warpriest, Golgoroth can be damaged outside of this phase, but he has such a massive health pool that any normal damage you do to him will be a drop in the bucket.
If you look at the ceiling in the center of the room, you’ll see a pale blue orb. Shooting this orb until it falls from the ceiling will cause Golgoroth and a bunch of other enemies to spawn (we’ll call them “adds” from now on). The adds will all run towards you from the far end of the room, using the raised walkways around the perimeter of Golgoroth’s pit. Your first job is to take them all out. To that end, you’ll want to split your fireteam into two groups, one in front of each walkway at the sides of the room. Again, you’ll have Adepts and Acolytes to worry about. Again, just try to kill the Acolytes before you kill the Adepts.
Once all of the adds are dead, look at the ceiling again. There should be six more of the pale blue orbs from the start of the fight. This time, however, shooting down an orb causes it to spawn a “Pool of Reclaimed Light” in Golgoroth’s pit. Standing in the Pool enables you to do roughly 10 times more damage to Golgoroth. Unfortunately, though, Golgoroth doesn’t like visitors in his pit. In order to stand in the pool without being quickly obliterated by the boss, you’ll need someone to hold his attention.
This is accomplished by having someone (we’ll call them the “Gazer” from now on) shoot Golgoroth in the white part of his head, the part surrounded by the weird spider-like limbs. This is much easier to hit from behind. That done, Golgoroth will attack the Gazer only for the next 18 seconds or until they die. Thankfully, instead of using his eyebeam attack, Golgoroth will shoot groups of three target-seeking orbs at the Gazer. The Gazer(s) can and should destroy these orbs by shooting them. For reasons that I’ll get to in a second, you’ll probably want to designate two players as your Gazers.
While the first Gazer is capturing Golgoroth’s Gaze or shortly thereafter, have them stand on one of the walkways at the sides of the room. Everyone else should be shooting down one of the orbs on the same side of the room in order to create a Pool of Reclaimed Light there. When the Gazer has Golgoroth’s attention (everyone will see a message above their Super bar which reads “Golgoroth focuses his rage” at this time), everyone but the Gazers should jump down into the Pool and begin shooting the boss in its brightly glowing stomach. As with most bosses in King’s Fall, a high-impact sniper rifle works best for this part. This is why your Gazer is standing on the side walkway: so that his stomach is visible to everyone in the Pool.
When one Gazer is about to lose Golgoroth’s focus, the other Gazer should again shoot the white part of the boss’ head in order to take over the job. It’s easiest to accomplish this by having the second Gazer stand on the walkway at the other side, so that Golgoroth will be facing away from them at this time. When the second Gazer has successfully captured Golgoroth’s focus, everyone in the pit should shoot down another blue orb on the other side so that they will again be able to shoot Golgoroth’s stomach while he is facing the second Gazer. At this time, Cursed Thralls will begin to spawn in the pit. The first Gazer should primarily concern themselves with killing these until it’s their turn to take the Gaze again.
This process can be repeated up to four more times, until there are no longer any orbs to shoot down. If one of the Gazers dies at some point during this process or things aren’t going according to plan for any reason, don’t sweat it. Just have everyone jump out of the pit to avoid being killed by Golgoroth and the process will begin again. I’ve found that a lot of groups try to make this part easier by planning for failure and only having one Gazer. In this strategy, the Gazer only has Golgoroth’s attention for one 18-second round. This way, even if they die it doesn’t really matter as everyone can just jump out of the pit slightly earlier and you’ll whittle Golgoroth’s health down slowly but surely until it’s dead.
Golgoroth
Both strategies are certainly valid, but almost every group I’ve been in has used the single-Gazer strategy, probably because it’s less complicated and easier to coordinate that way. That said, all you gain by having a single Gazer is one additional player damaging the boss during Pool of Reclaimed Light phases. By contrast, you potentially lose somewhere around a minute and a half of extra time to damage the boss during that phase as well.
Whichever strategy you choose, it’s basically rinse and repeat until you kill the boss. Just keep in mind that you can’t have more than six deaths throughout the fight or it will trigger the “Tablet of Ruin,” which will kill your entire fireteam at once. Also note that when Golgoroth reaches half health, Hive adds will stop spawning and Taken Thralls will begin to continuously respawn in the pit instead. As such, once you get to that point, don’t worry too much about killing all of them before you begin the Pool phase .